Annotating your segmentation
You are now ready to annotate your JSON EMDB-SFF file without geometry. If your segmentation still has geometry, go back to the Converting to EMDB-SFF section to do this.
There are two ways of annotating an EMDB-SFF file:
Online with SAT, or
Locally with
sfftk(for advanced users only)
Note
EMPIAR Account Required
You will need an EMPIAR account to log in to SAT. You can register for one by clicking here (Ctrl + click or Cmd + click the link to open it in a new tab).
Online with SAT
Create a project to organise related segmentations.
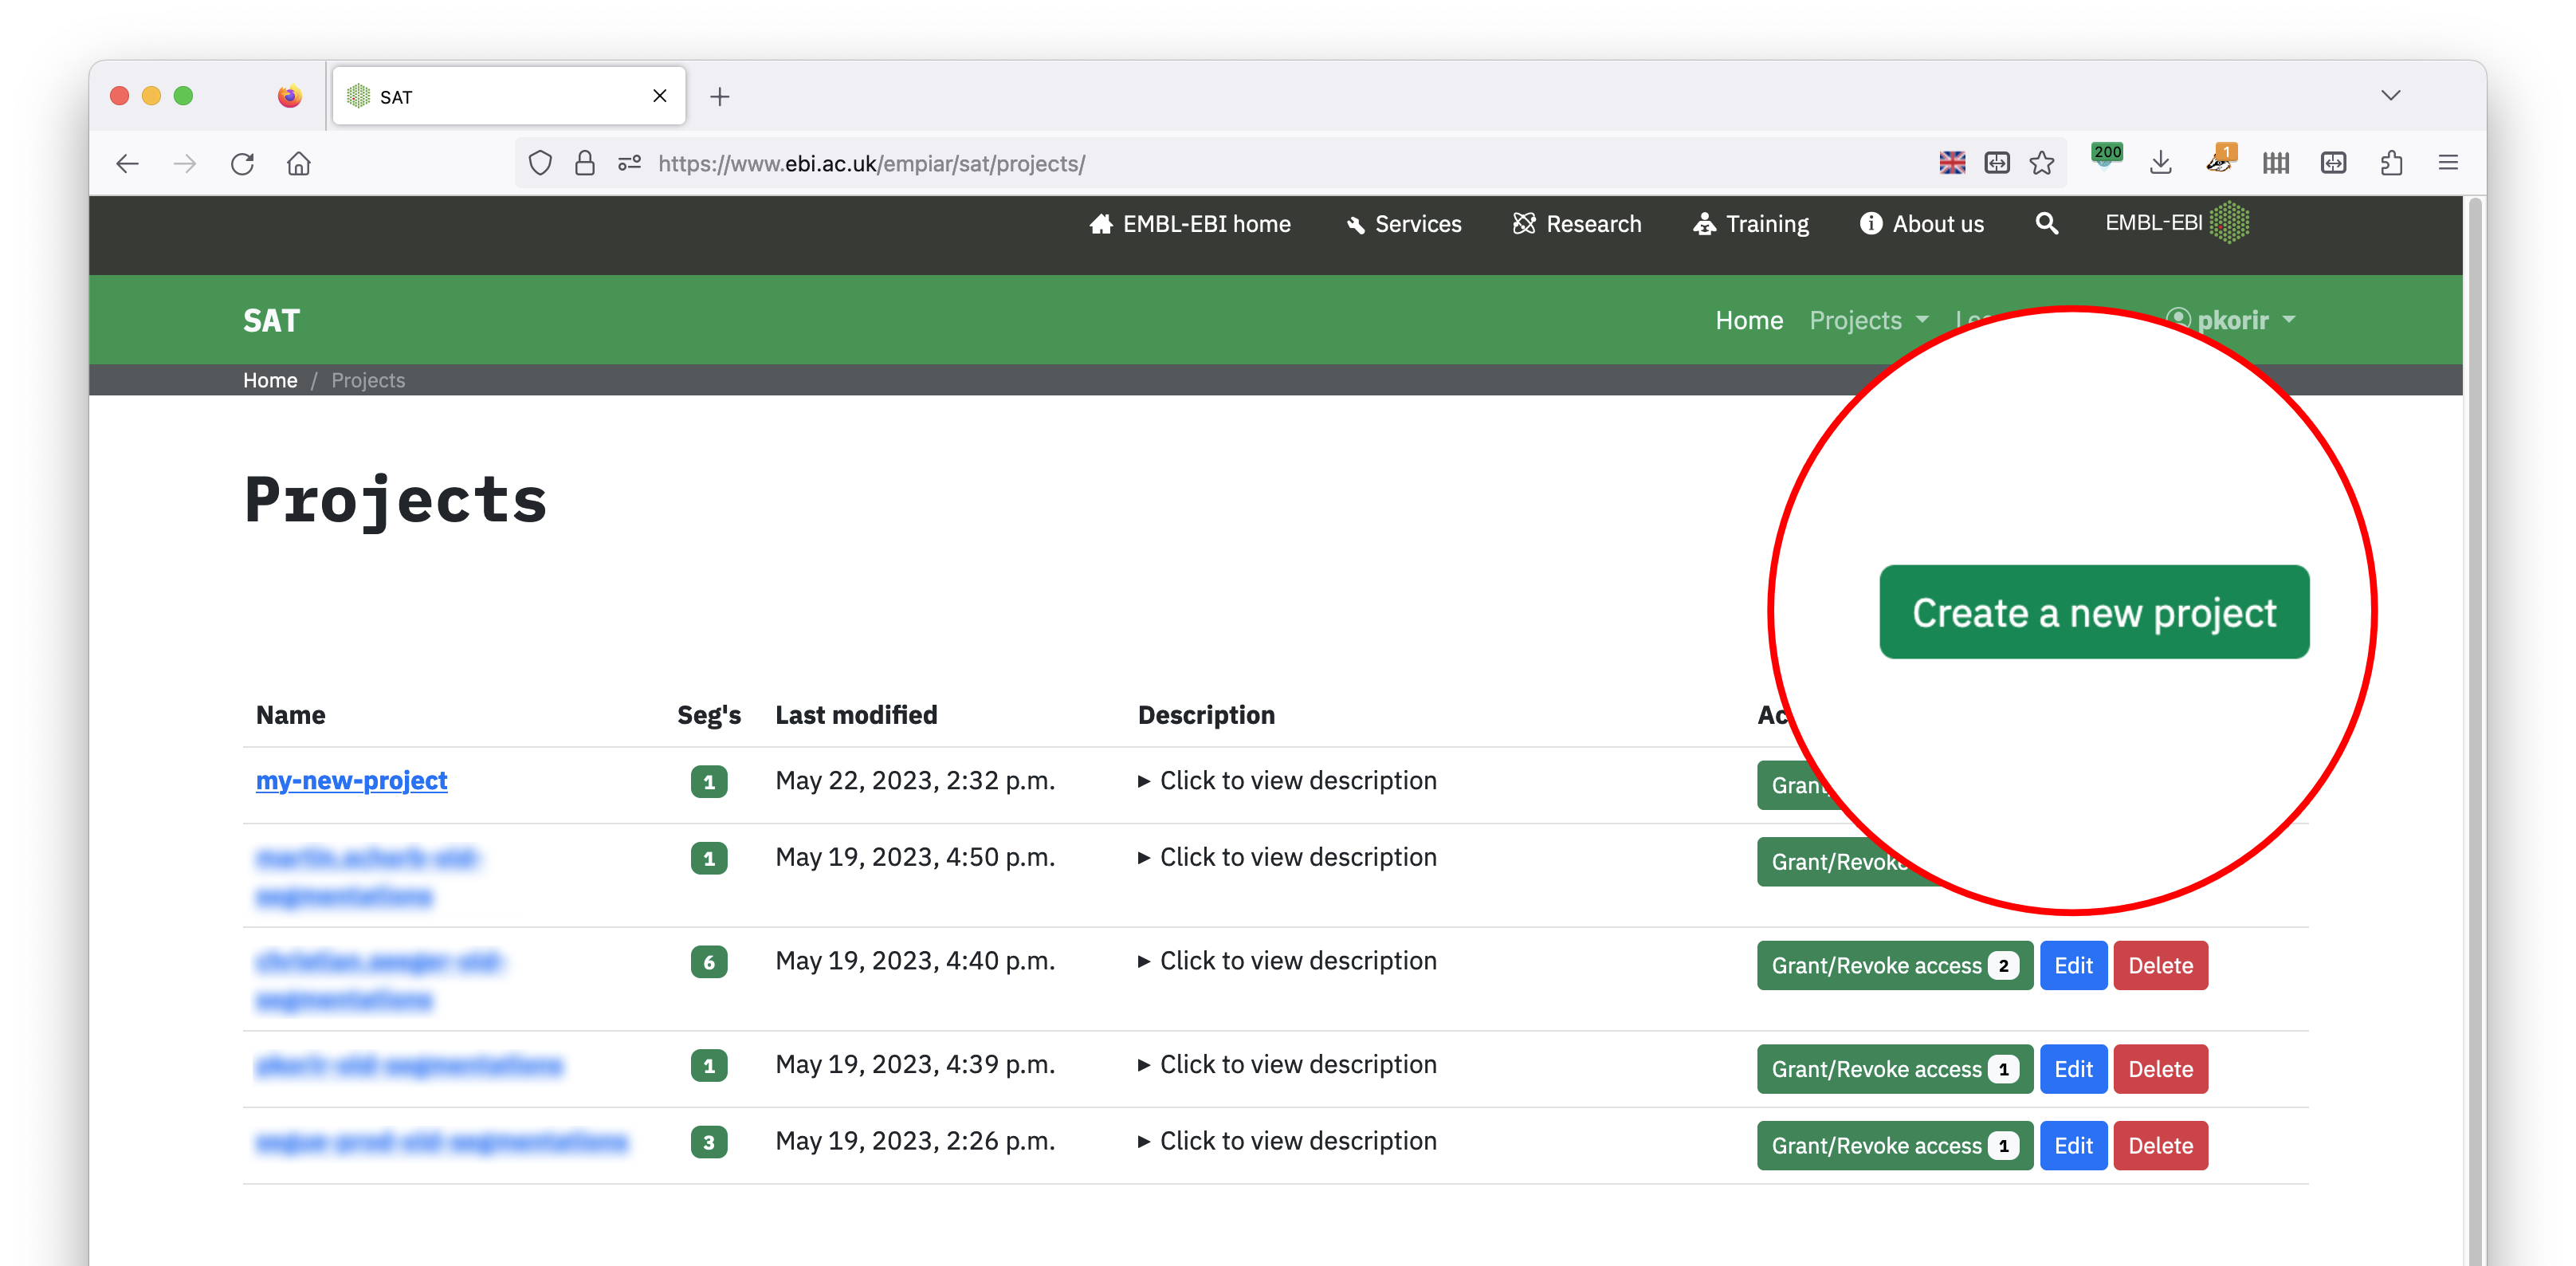
Use Create a new project button to organise a set of related segmentations.
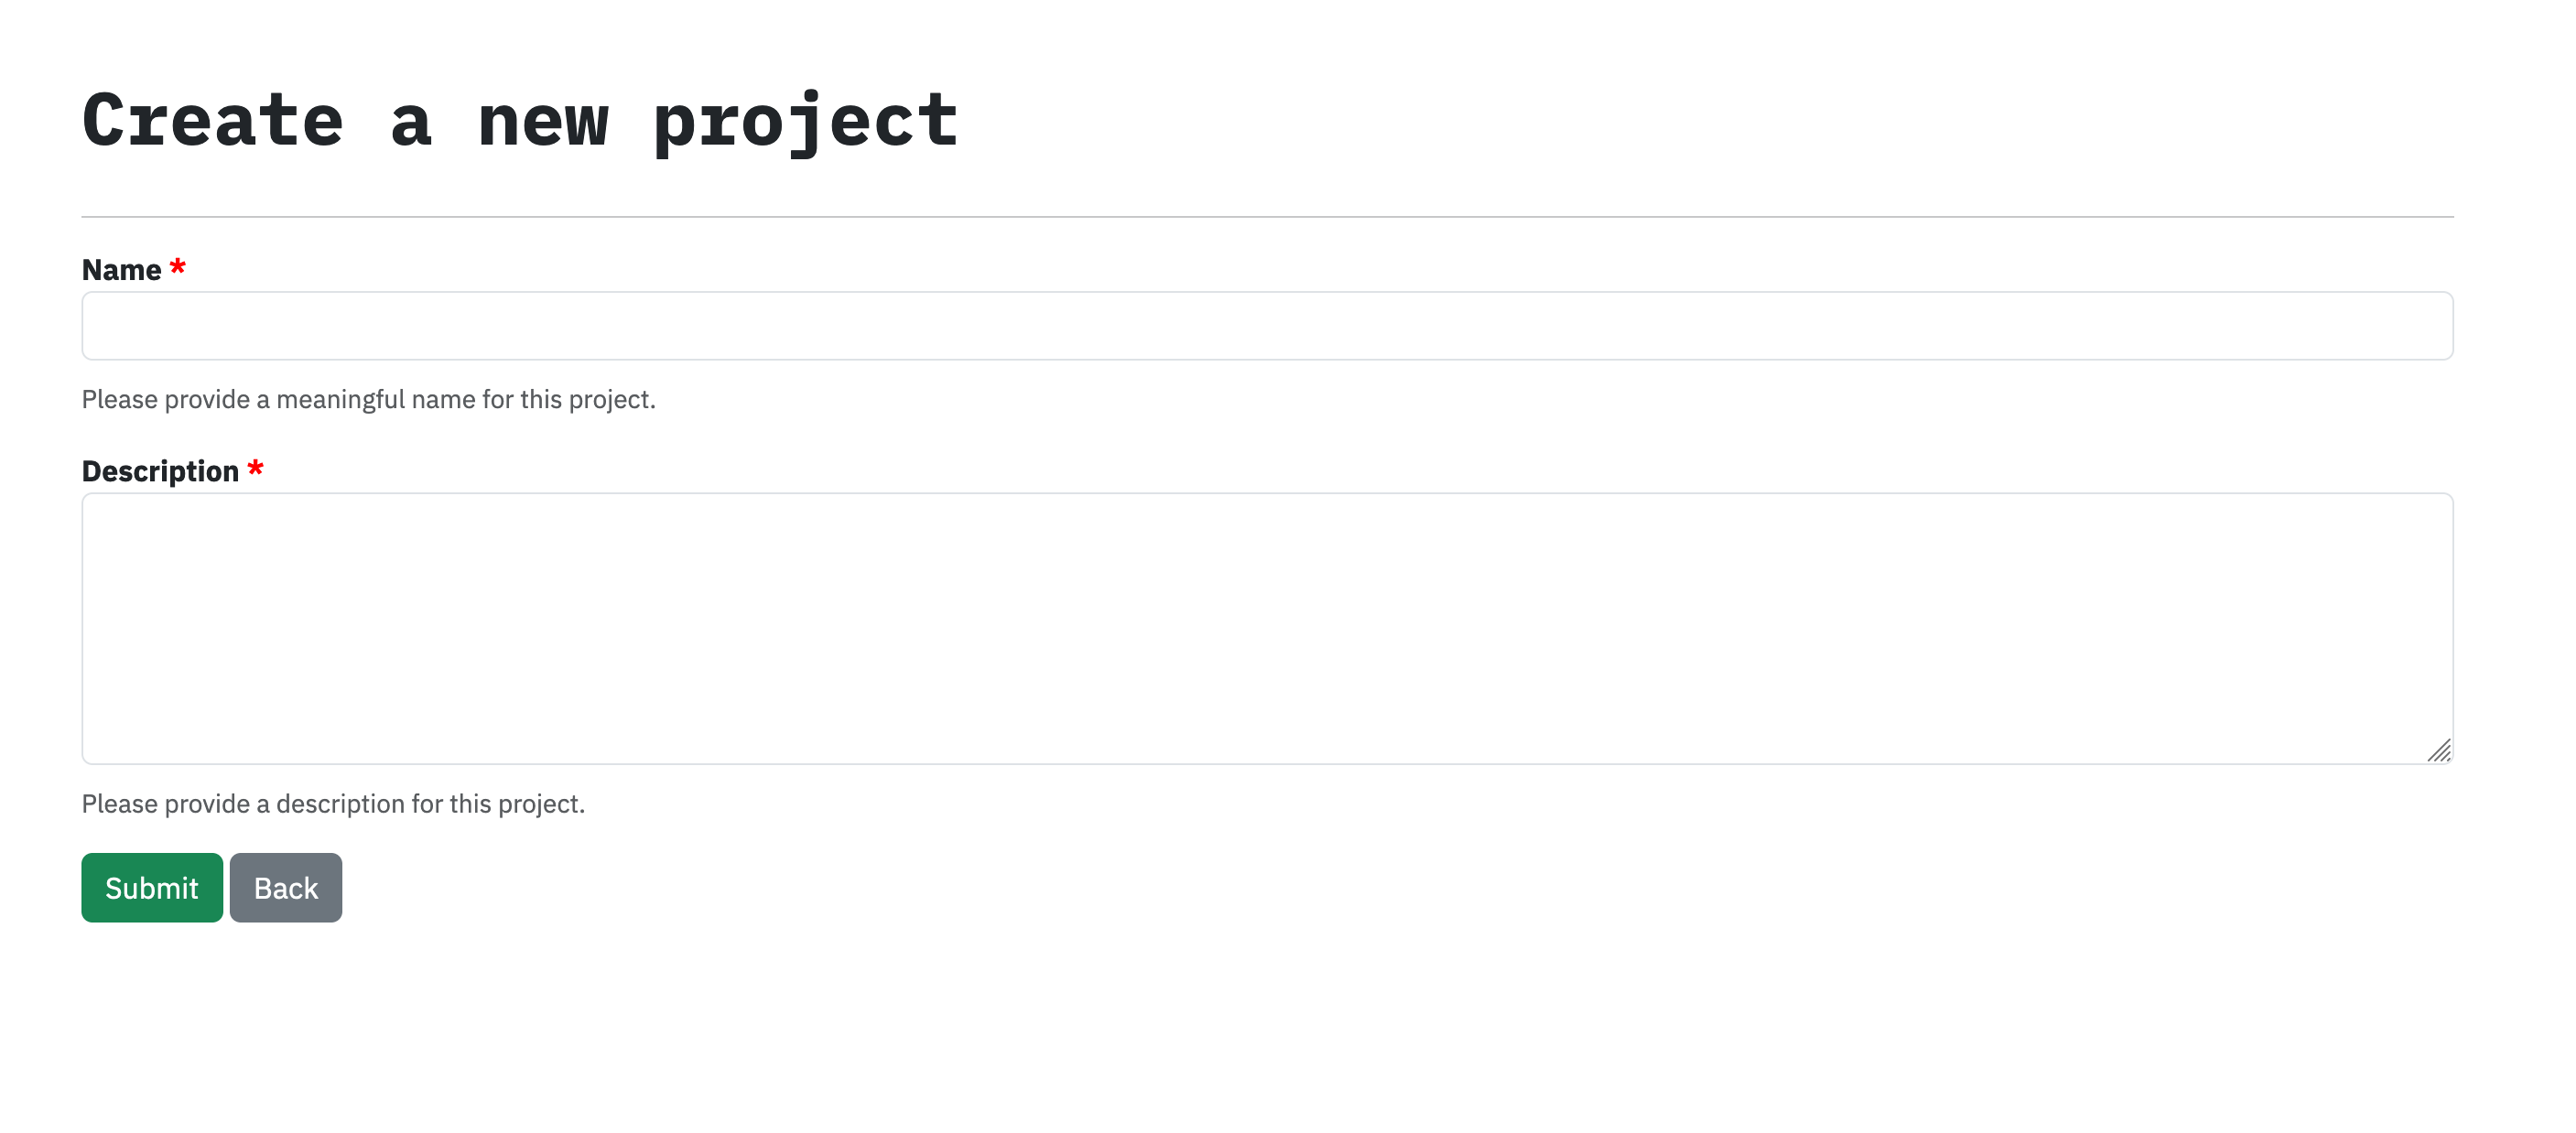
The name and description fields are required.
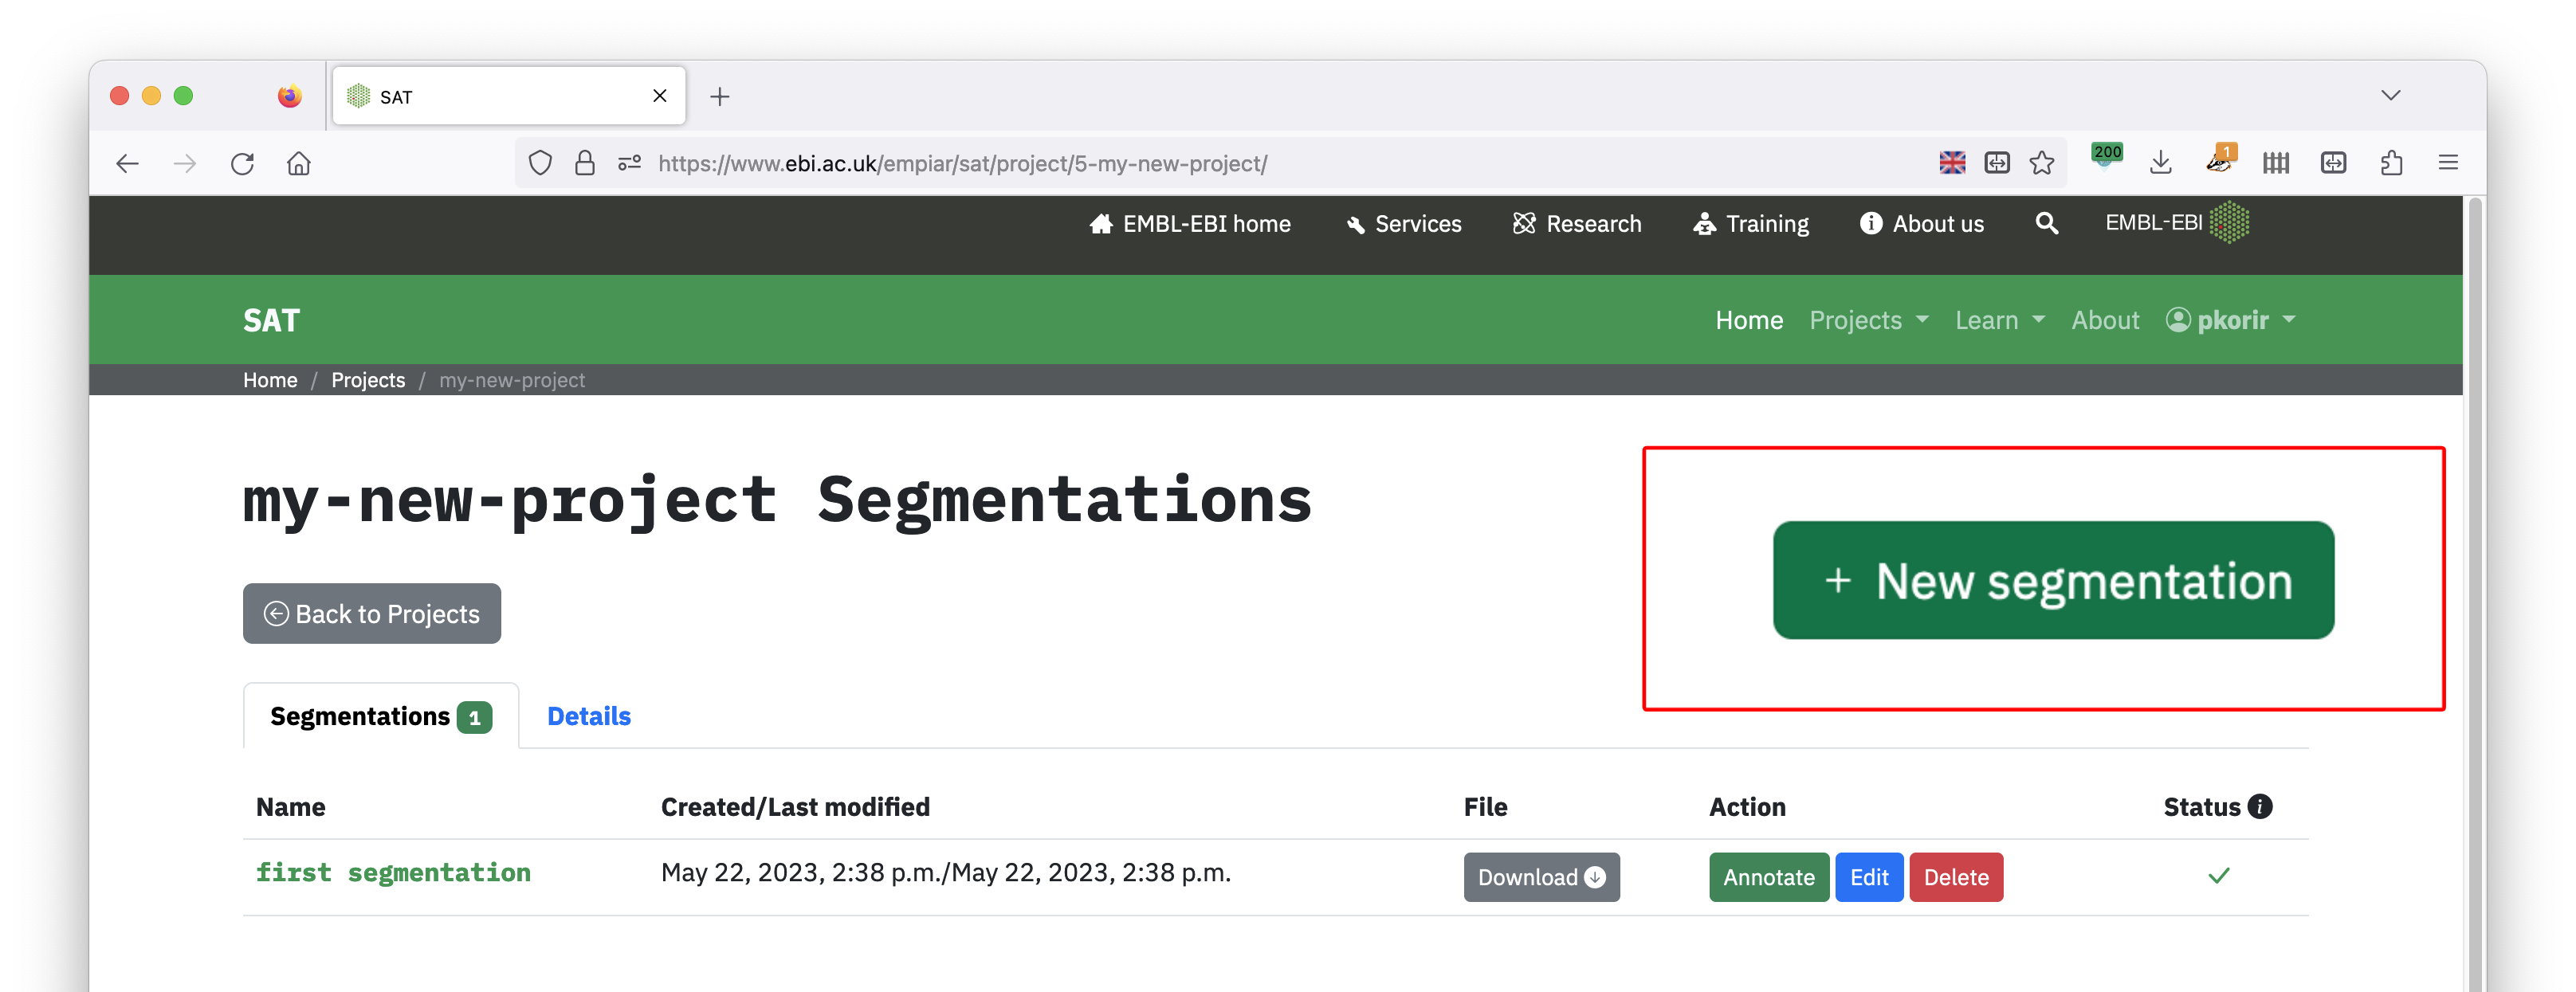
Create a segmentation and upload the segmentation file. The Status field tells you whether your segmentation is OK for annotation. If it is OK, the Annotate button will be active; otherwise it will be disabled.
Only EMDB-SFF JSON files with no geometry are accepted.
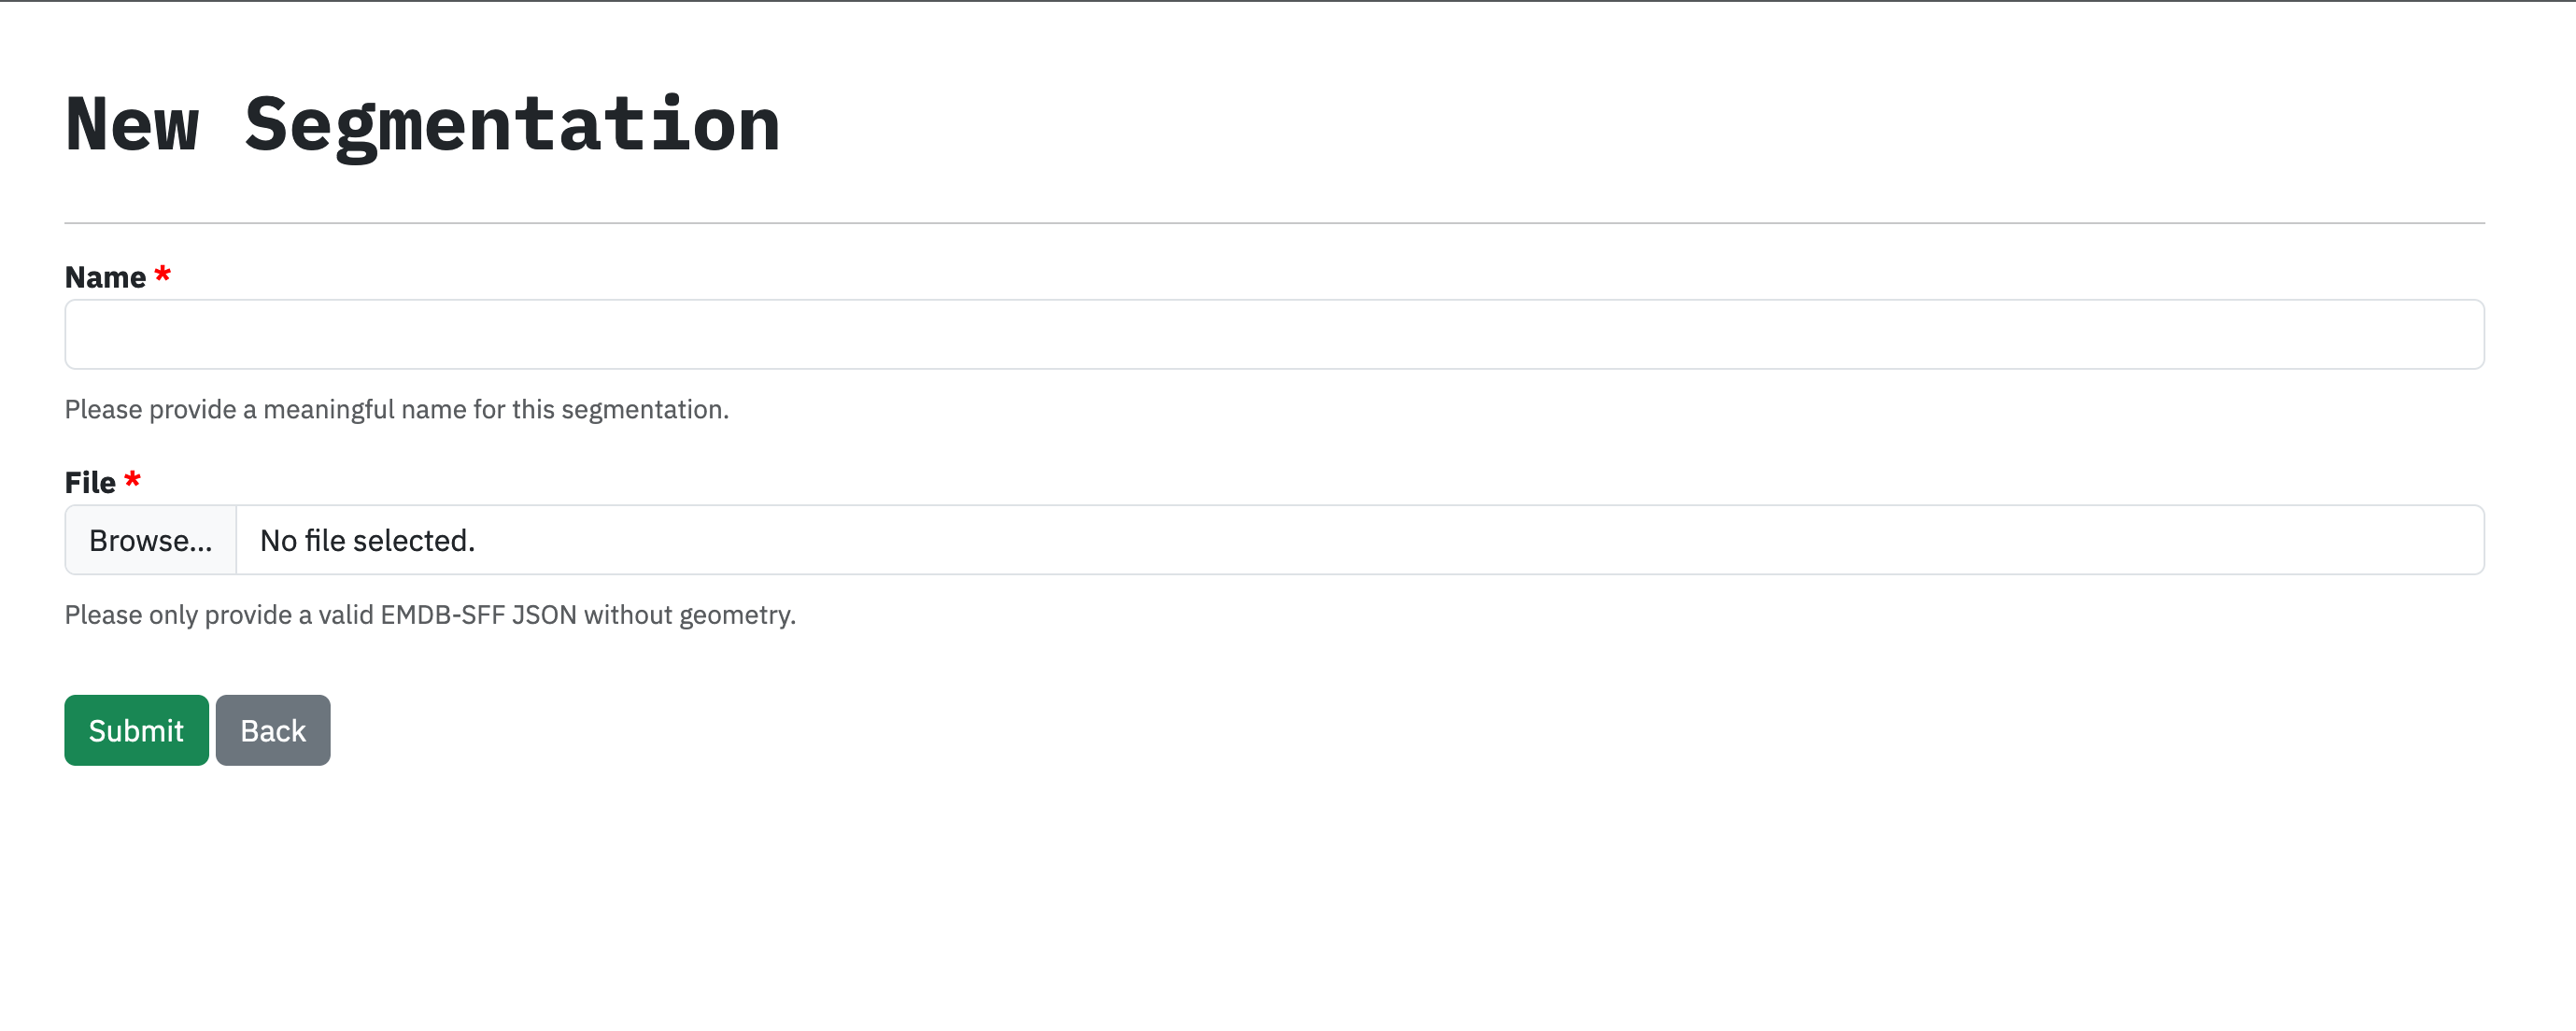
The name and file fields are required.
Launch the annotate tool by clicking the Annotate button along the segmentation’s row.

On each row are provided buttons to download, annotate, edit or delete the segmentation. The Status field indicates if the file can be annotated.
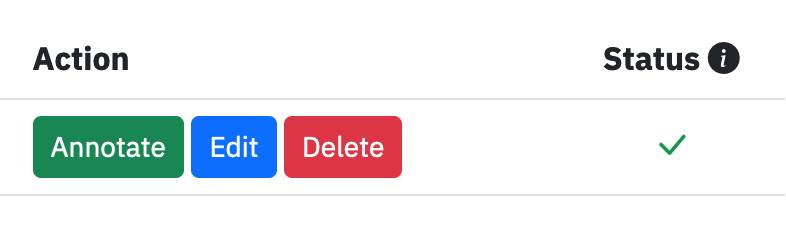
Click the Annotate button to annotate a segmentation.
The annotation tool has three main sections:
Metadata tab, which displays a top-level description of the segmentation that you can annotate with terms that apply globally (global external references);

Segments tab, which lists your segments with any segment-specific annotations; and

Find tab, used to search various resources for accessions.

Annotation proceeds by searching for relevant terms then assigning them to the appropriate region of interest: accessions that apply to the entire segmentation e.g. organism, cell line, procedural method, equipment are assigned to global external references and those that apply to one or more segments go to the respective external references.

It is highly recommended to also include the following annotations:
A name for the segmentation
A detailed description of the segmentation
A list of the software used when creating the segmentation by specifying the name, version and processing details it was used for
A name and brief description for each segment
You can edit the segment colour and opacity using the colour selection button and opacity slider. The colour button opens a colour picker. After closing the colour picker, you many need to click on another segment for the colour and opacity changes to take effect.
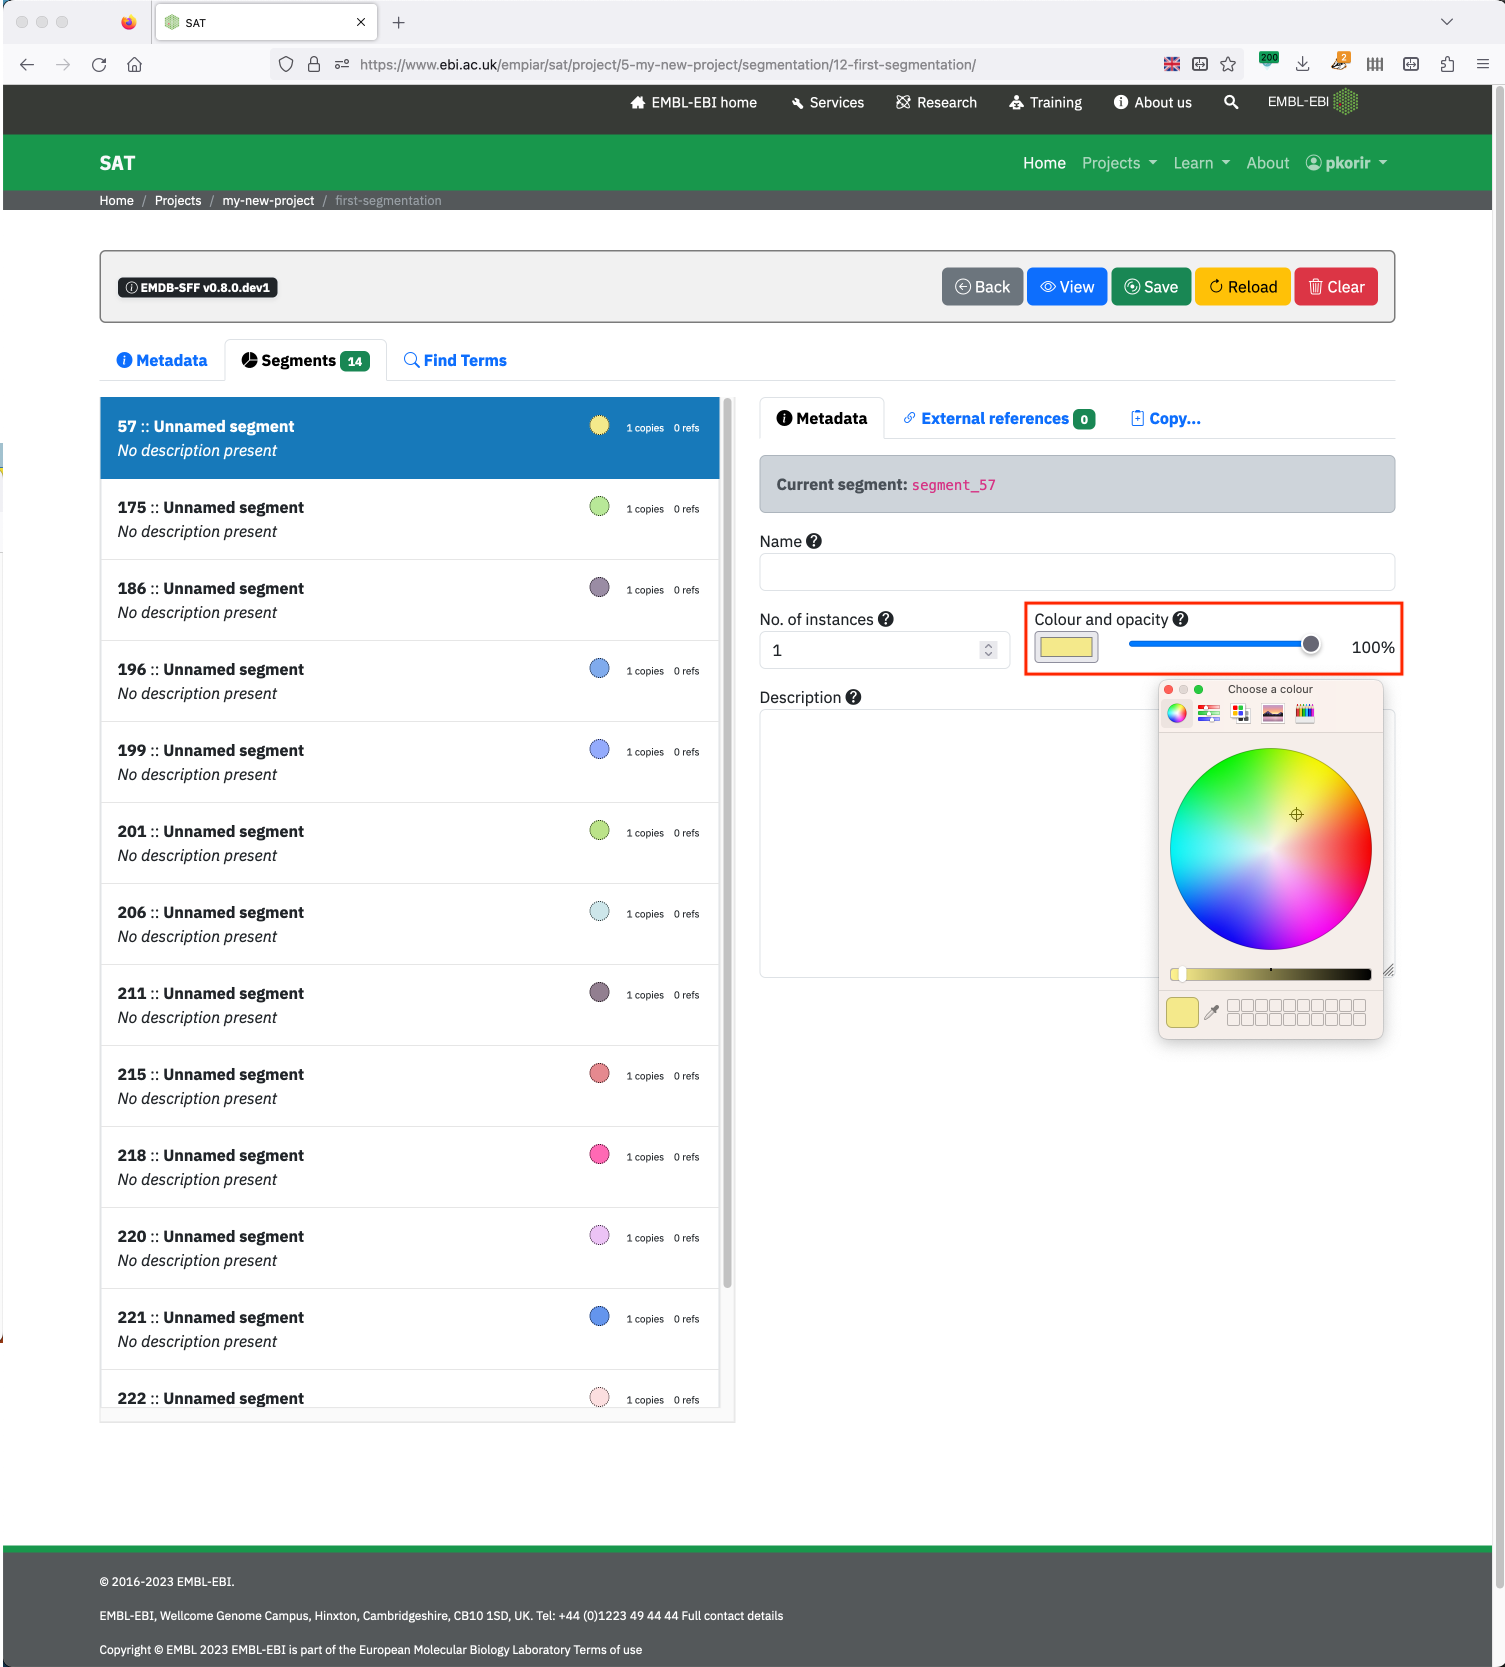
Clicking the colour button opens the colour picker while the slider selects the segment colour opacity (0% is transparent; 100% is opaque).
SAT automatically saves all changes made but we recommend manually saving from time to time.
Warning
Caution! If required, you can reset the segmentation by clearing all fields. This is non-reversible.
Granting access to your project
Note
EMPIAR Account Required
You will need to know the EMPIAR account username of any user who you need to grant access to. Users can register by clicking here (Ctrl + click or Cmd + click the link to open it in a new tab).
Segmentations are rarely the work of a single individual. SAT allows you to share your segmentation with other users so that they can contribute annotations. All users who collaborate must have an EMPIAR account. Please ensure that all collaborators register for an EMPIAR account before you proceed.
The Projects page shows all projects that you have access to. You can access the page by clicking the Projects link in the navigation bar. The Grant/Revoke access buttons allow you to grant or revoke access to your project.

The Grant/Revoke access button also shows the number of permitted users (include yourself) that have access to the project.

Enter a valid username to grant access to your project. Consult with the other user to ensure that they have an EMPIAR account.

A message is displayed to confirm that the user has been granted access to your project.

If the username is invalid, a message is displayed to indicate that the user could not be found.
Once the project is shared, the other user will need to refresh their browser to see the project in their list of projects.
It is not possible at this time to grant access to a subset of segmentations in a project. If you would like to do so, first create a new project and upload only those segmentations to the new project.
Warning
Only one user at a time can edit a segmentation. If you are editing a segmentation and another user tries to edit the same segmentation it is highly likely that the segmentation will become corrupt.
If you would like to get assistance from the EMPIAR team, please select the Administrator user to grant access to your project.

Select the Administrator user to grant access to your project.
Revoking access to a project
Simply click the Revoke button to revoke access to your project.
The Revoke button will revoke access to the given user immediately.
Locally with sfftk (advanced users)
Begin by searching for the terms of interest as follows:
sff notes search ‘mitochondria’ # quotes for multiple words
Take a note of the values of the resource, url and accession fields for the result of interest.
To apply the given accession to the whole segmentation (global external references) simply pass the three values after the
-E/–external-referenceflag as follows (don’t forget to substitutegeometry.hffwith the name of your EMDB-SFF file):sff notes add -E <resource> <url> <accession> geometry.hff
This enters an ‘edit state’ that creates a temporary file for annotating. All annotations will now be performed against a temporary file handle
'@'. For instance, to add another global external reference we would now use:sff notes add -E <resource> <url> <accession> @
substituting
@for the name of the file because we are in the edit state. You can add more than one external reference at once by entering multiple-Eflags:sff notes add -E <r1> <u1> <a1> -E <r2> <u2> <a2> @
With this in mind, it might be more efficient to find all terms, compile them into a text document, then finally add them to the file together.
To apply an accession to a single segment we follow the exact same instructions in (2) above and specify the segment identifier (ID) to annotate. To see the segment IDs, run the following:
sff notes list geometry.hff # not in edit mode
sff notes list @ # if in edit mode
Now include the
-i/--segment-idargument followed by the segment ID together with the external reference information:sff notes add -i <segment_id> -E <r> <u> <a> @
If you would like to display the segment annotation in detail use the following:
sff notes show -i <segment_id> --long-format @