- Course overview
- Search within this course
- What is BioImage Archive?
- Searching data in the BioImage Archive
- Visualising image data in the BioImage Archive
- Getting data from the BioImage Archive
- Your feedback
- Get help and support on BioImage Archive
- References
![]()
All materials are free cultural works licensed under a Creative Commons Attribution 4.0 International (CC BY 4.0) license, except where further licensing details are provided.
Study component organisation
A submission can contain one or more Study Components. The Study Component explains the context of your image data (and analysed data if applicable). It includes information on the biosample, specimen, image acquisition, and image correlation and analysis if applicable. There are different ways to structure your submission into Study Components. Here we provide five different examples.
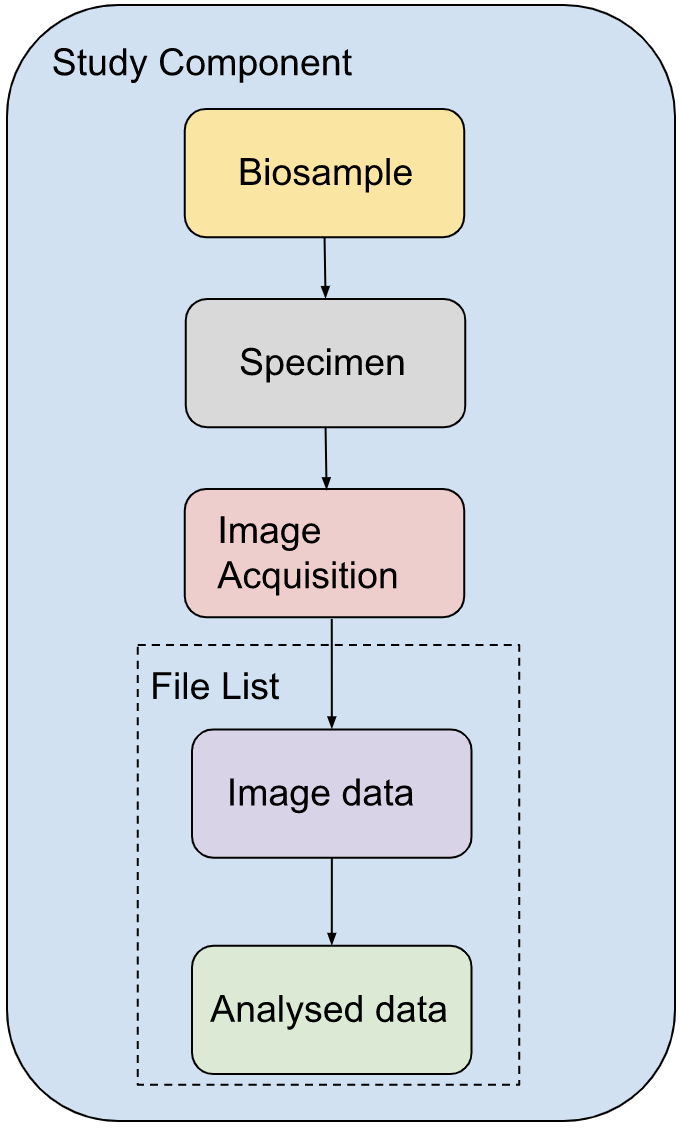
Example 1
The simplest case is where a single specimen is obtained from a biosample and goes through image acquisition (Figure 11).
This Study Component structure may also be used for cases where the biosample and image acquisition parameters are the same but specimen differs from image to image, e.g. high content screening (HCS) type of data. In those cases common properties of the specimen would be put in the submission form and any differences in specimen would be written in the File List.
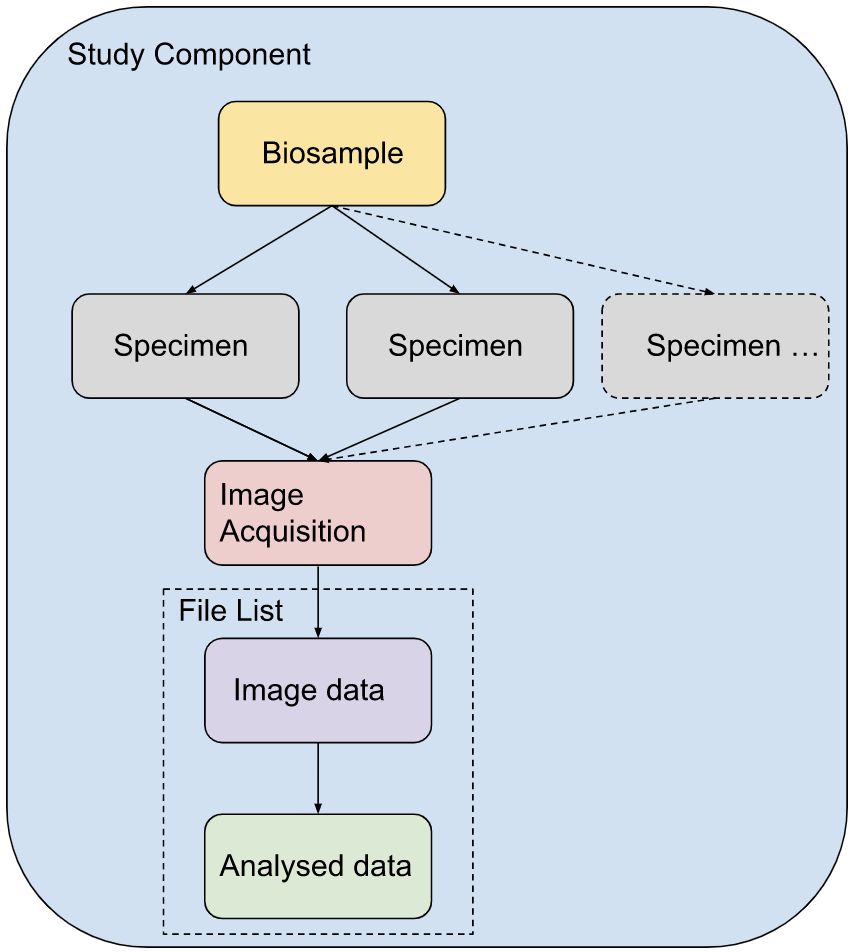
Example 2
The second example is where there are multiple specimen obtained from the same biosample, i.e. to which different growth protocols and/or imaging protocols are applied, and then imaged (Figure 12).
A live-cell imaging study of yeast cells, S-BIAD449, is a good example of this case, however please note that it is an older submission so its metadata is not in REMBI format.
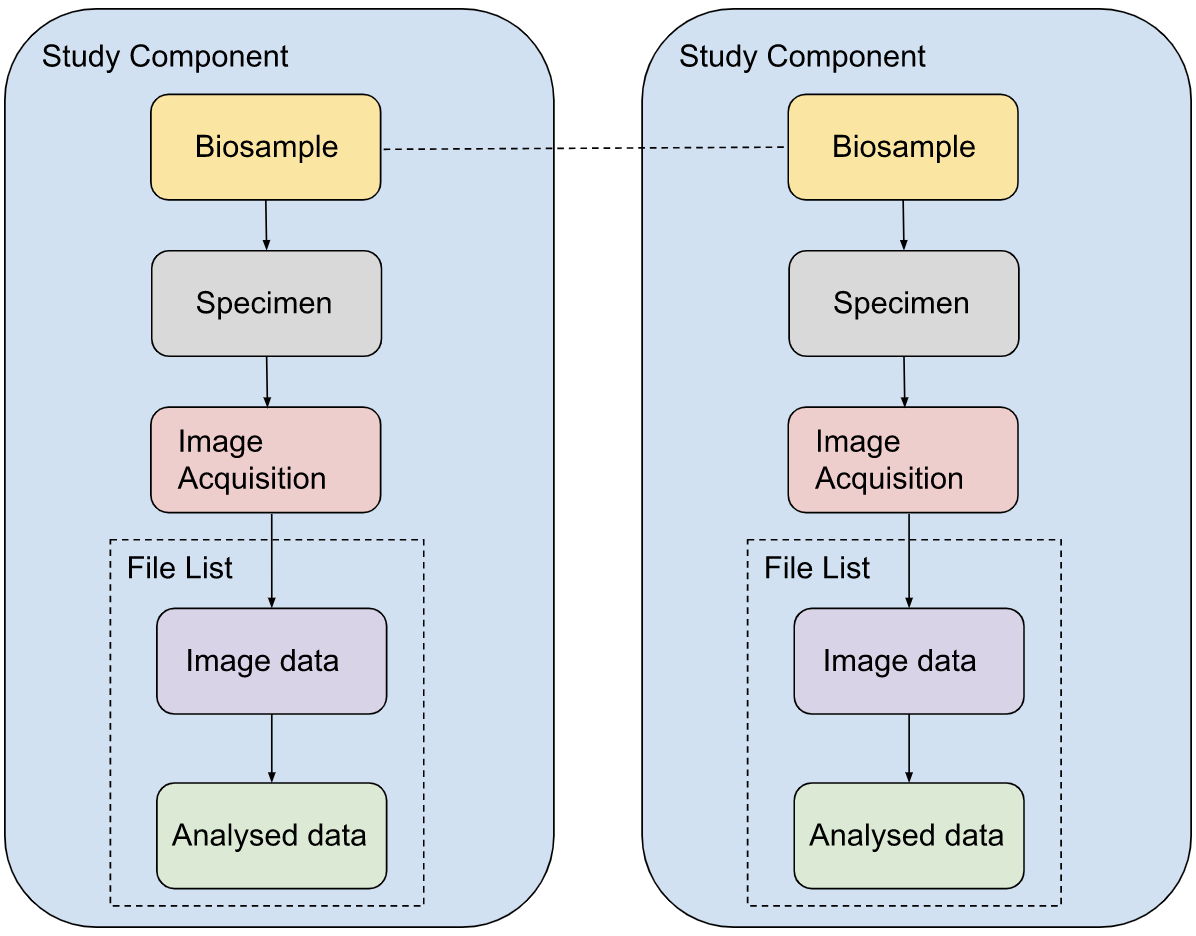
Example 3
The biosample is the same but both the specimen and image acquisition methods are different, resulting in different image data. In these cases splitting the study into more than one study components makes sense (Figure 13).
S-BIAD15 is a good example for this case, however please note that it is an older submission so its metadata is not in REMBI format.
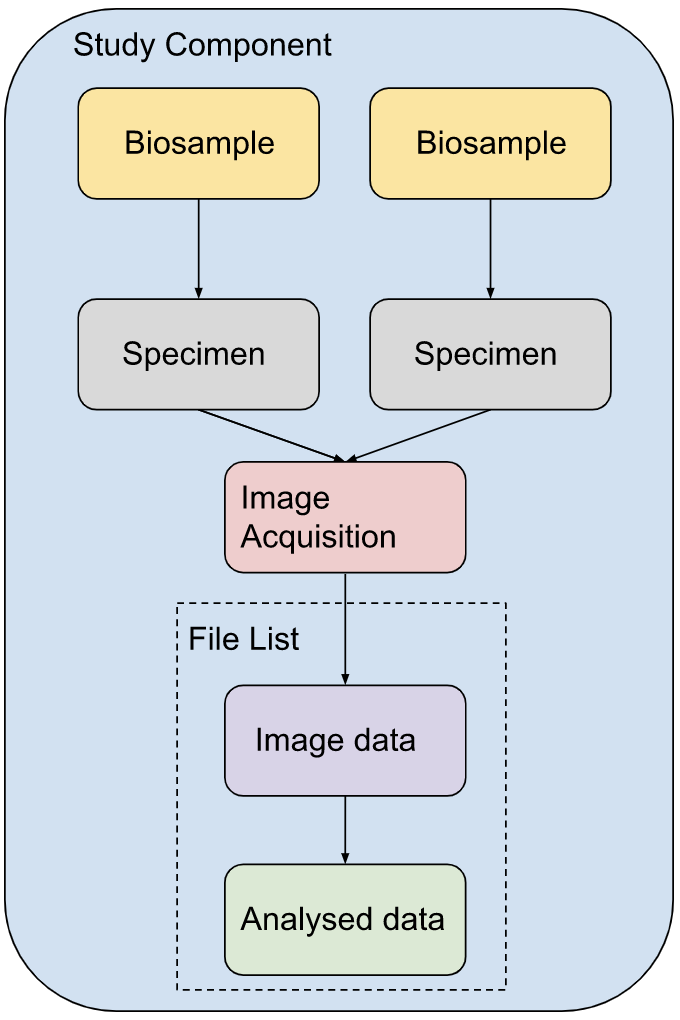
Example 4
Different biosample and specimens can also be put into the same study component if the image acquisition method and parameters are the same. One prominent example is if more than one tissue is imaged on the same slide or scan (Figure 14).
Example 5
This is the case if the same sample is imaged using two different imaging methods or with different image acquisition parameters and then put together for an analysis (Figure 15).
Correlative studies are perfect examples for this case, e.g. where the same specimen is first imaged using light microscopy, followed by electron microscopy. An example case is S-BSST429 where light microscopy images are deposited at the BioImage Archive and 3D electron microscopy data are deposited at the EMPIAR database with links to each other. However please note that this is an older submission, therefore its metadata is not in REMBI format. You can find more about which archive to use to deposit your correlative datasets here.
